Most pizza dough problems look different but come from the same short list of causes. Dough that won’t rise, won’t stretch, tears, bakes up tough, or stays gummy in the middle are not five unrelated failures. They are five symptoms of four underlying levers: gluten, yeast, hydration, and temperature. Once you can read which lever went wrong, the fix is usually obvious and fast.
This is the pizza dough troubleshooting method we use in our own kitchen when a batch misbehaves. Find your symptom in the table, jump to its section for the why and the fix, and you will leave knowing not just how to rescue this dough but how to keep it from happening again.
Who this is for: anyone making pizza dough at home, from a first weeknight batch to a regular cold-ferment routine, who wants to stop guessing and start diagnosing.
TL;DR
- Dough won’t rise: the yeast is dead, too cold, or drowned in salt. Proof the yeast, warm the dough to 75 to 80F, and keep salt off direct contact with yeast.
- Dough shrinks back or won’t stretch: the gluten is tight. Rest it 15 to 30 minutes and try again. This is the single most common fix.
- Dough tears or holes: under-developed gluten or over-stretched too fast. Develop the dough more, then stretch gently from the center out.
- Dough is tough or dense: too much flour, too little water, or not enough fermentation. Raise hydration and give it time.
- Dough is too sticky: that is often correct high hydration. Wet your hands, use a bench scraper, and stop adding flour.
- Crust bakes gummy: the baking surface was not hot enough. Preheat a stone or steel a full hour and bake until the bottom is browned.
The pizza dough troubleshooting table
| Symptom | Most likely cause | The fix |
|---|---|---|
| Not rising / barely rising | Dead or cold yeast, too much salt, not enough time | Proof yeast, warm to 75 to 80F, give it 1 to 2 hours |
| Overproofed (collapsed, sour) | Too long or too warm a rise | Gently reball and re-rest, or bake flat as focaccia |
| Shrinks back / won’t stretch | Tight, under-rested gluten | Rest 15 to 30 minutes, then stretch |
| Tears or develops holes | Weak gluten or too-fast stretching | Develop more, stretch gently from the center |
| Tough, dense, bready | Too much flour, low hydration, short ferment | Raise hydration, ferment longer |
| Too sticky / wet | High hydration or under-developed | Wet hands, bench scraper, stop adding flour |
| Too dry / stiff / crumbly | Too much flour or too little water | Add water a teaspoon at a time, rest |
| Sticks to the peel | Wet dough, too much time on the peel | Semolina on the peel, work fast |
| Gummy / doughy center | Cold baking surface, too thick, too wet | Preheat stone or steel 1 hour, bake until bottom browns |
| Pale, won’t brown | Oven too cool, not enough sugar, short ferment | Max heat, longer ferment, touch of sugar |
| Bottom burns first | Surface too hot relative to top | Move rack up, lower stone temp, finish under broiler |
The four levers behind every dough problem
Before the symptoms, the mechanics. Almost everything that goes wrong with pizza dough is one of these four going off target.
Gluten is the protein network that gives dough its stretch and chew. When flour meets water and gets worked, two proteins, gliadin and glutenin, link into the elastic web that pizza needs, as Serious Eats lays out in its breakdown of how fermentation builds dough. Too little gluten development and the dough tears; too much without rest and it snaps back like a rubber band.
Yeast is the engine. It eats sugars and exhales carbon dioxide, which inflates the dough. Yeast is alive, so it can be dead on arrival (old or scalded), sluggish (too cold), or running wild (too warm or too long). Most rising problems are really yeast problems.
Hydration is the ratio of water to flour by weight, expressed as a baker’s percentage. A 65% hydration dough has 65 grams of water per 100 grams of flour. Hydration controls how sticky, how extensible, and how open the crumb is. A lot of “my dough is wrong” complaints are actually a hydration that does not match the cook’s skill or oven.
Temperature runs through all of it: water temperature sets yeast activity, dough temperature sets rise speed, and oven and surface temperature decide whether the crust browns or stays raw. A target final dough temperature of about 75 to 80F keeps fermentation predictable.
Read the symptom, find the lever, and the fix follows.
Pizza dough not rising (or barely rising)
The fix in one line: prove the yeast is alive, then get the dough to 75 to 80F and give it time.
A dough that sits flat after an hour or two has a yeast problem nine times out of ten. Run through the causes in order:
Dead or old yeast. Yeast loses potency past its date or after months in a warm pantry. Test it: stir a teaspoon of your yeast and a pinch of sugar into 1/4 cup of 100 to 110F water. Within 10 minutes it should foam and smell bready. No foam means dead yeast, and no rise will follow. King Arthur’s yeast guide covers viability and the proofing test in depth. If your yeast is gone and you need pizza tonight, switch to our no yeast pizza dough recipe, which leavens chemically instead.
Water too hot or too cold. Water above roughly 130F kills yeast outright; cold water from the tap stalls it. Aim for warm-to-the-wrist water, around 100 to 110F for proofing.
Too much salt in direct contact. Salt is a yeast inhibitor. A normal dose (about 2 to 3% of flour weight) is fine once mixed, but yeast sprinkled directly onto a pile of salt can be stunted before it starts. Mix salt into the flour first, add yeast to the water.
The dough is just cold. Yeast slows dramatically below 70F. A dough mixed with cold flour in a cold kitchen will look dead when it is only sleeping. Move it somewhere warm: an oven with just the light on, or near (not on) a warm surface, and give it another hour before you give up.
Overproofed pizza dough (collapsed, sour, sticky)
The fix in one line: gently reball and rest it, or repurpose it flat; do not punch it down and expect a great pizza.
Overproofing is the opposite failure: the yeast ran too long or too warm, ate through the available sugars, and the gluten lost its ability to hold gas. The signs are a dough that has risen and then sunk back, smells strongly of alcohol or vinegar, feels slack and wet, and tears into a sticky web when you pull it.
Why it happens: a warm-room rise that went past 2 hours, a kitchen above 75F, or too much yeast for the timeline. This is why a long flavor-building rise belongs in the refrigerator, not on the counter. Kenji’s testing at Serious Eats found the ideal cold ferment runs three to five days, because the fridge slows the yeast enough to develop flavor without overproofing.
Can you save it? Mildly overproofed dough comes back: deflate it gently, reshape into a tight ball, and rest it 20 to 40 minutes so it builds a little fresh gas. Badly overproofed dough that has collapsed and gone sour has spent its structure. Do not fight it into a pizza that will bake dense and flat. Press it into an oiled pan and bake it as a focaccia, where oven spring matters less. Our sourdough pizza dough guide goes deeper on reading fermentation, since wild-yeast dough is easiest to overproof.
Pizza dough keeps shrinking back or won’t stretch
The fix in one line: stop fighting it, cover it, and let it rest 15 to 30 minutes.
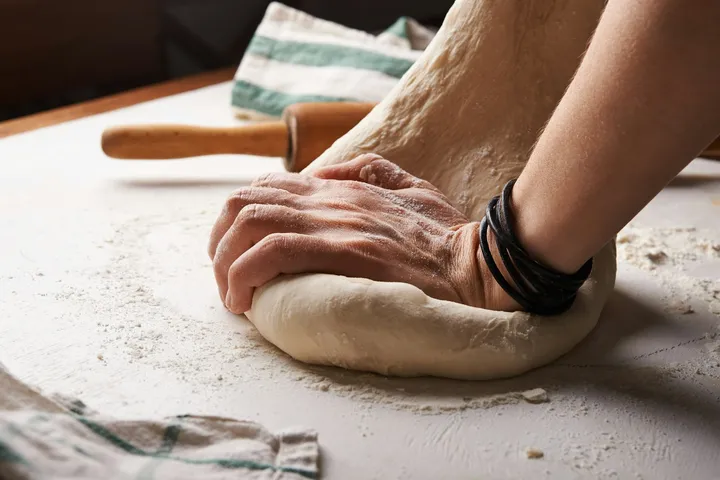
This is the most common and most fixable problem in home pizza making. You stretch the dough, it springs back to a smaller circle, you stretch again, it shrinks again. The cause is tight gluten. As King Arthur explains, the stubborn snap-back comes from gluten strands that have been wound too tight by kneading and shaping, and the only real cure is to let them relax.
The fix: walk away. Cover the dough and rest it 15 minutes, longer if it is still fighting you. Relaxed gluten stretches without resistance. Two prevention habits help: divide and ball the dough right after kneading so it relaxes into a round during its rise, and always bring cold dough to room temperature (60 to 90 minutes out of the fridge) before stretching, because cold gluten is tight gluten.
Technique matters too. Stretch from the center outward with your fingertips and let gravity help by draping the dough over your knuckles, rather than yanking the edges. Our full walkthrough on how to stretch pizza dough covers the hand positions that stop the tug-of-war.
Pizza dough tears or develops holes when stretching
The fix in one line: develop the gluten more if it is weak, and stretch slowly from the center if you are rushing.
Tearing has two opposite causes, so diagnose before you act.
Under-developed dough has not built enough gluten to hold together thin. It feels slack and rips into ragged holes with little resistance. The fix is more development: a few more minutes of kneading, or a couple of stretch-and-fold cycles during the bulk rise to build strength without overworking.
Over-stretched dough is the more common home cause. The gluten is fine, but you thinned the center too fast or too far and it gave way. The fix is patience and gentleness: stretch gradually, keep the center slightly thicker than the rim, and if a hole opens, pinch it closed and even out the surrounding dough. A dough that tears specifically in the middle while the edges stay thick is usually fine dough plus impatient hands. Overworked, over-tight dough (see the FAQ on what overworked dough looks like) also tears, and there the answer is rest, not more handling.
Pizza dough is tough, dense, or bready
The fix in one line: raise hydration, ferment longer, and stop adding flour during shaping.
Tough, bready crust that chews like a dinner roll instead of a pizza means the dough was too tight and too dry. The usual culprits:
Hydration too low. A stiff, dry dough bakes dense. Most pizza styles live between 60 and 70% hydration; if your dough felt firm and easy to handle from the start, it was probably too dry. Nudge hydration up a few points next batch. Serious Eats walks through how hydration changes texture across dough styles.
Too much flour worked in during shaping. Every handful of bench flour you knead in lowers the effective hydration and tightens the crumb. Use the minimum dusting needed to keep it from sticking.
Not enough fermentation. Fermentation does more than leaven; it relaxes the dough and builds the open, tender structure. A same-day dough is tighter and breadier than the same recipe given a 24 to 72 hour cold ferment. If your crust is consistently dense, the cheapest upgrade is time in the fridge.
Wrong flour. Very high-protein flours build aggressive gluten that bakes chewy. For a tender crust, do not reach past bread flour unless the style calls for it. Our guide to pizza flour and protein content explains how the W-rating and protein level set the chew. For a benchmark of a tender, well-fermented dough, see our Neapolitan pizza dough method.
Pizza dough is too sticky or wet to handle
The fix in one line: if the recipe is high hydration, the stickiness is correct; manage it with wet hands and a bench scraper instead of flour.
Sticky dough panics new pizza makers into dumping on flour, which is exactly the wrong move. First decide whether the stickiness is a problem or a feature.
A 70%+ hydration dough is supposed to feel tacky. That high water content is what gives an airy, blistered crust, and the answer is technique, not more flour. Keep a bowl of water nearby and wet your hands, use a metal bench scraper to lift and fold rather than your fingers, and let a short rest (the dough firms as gluten organizes) do some of the work. Oiled hands and an oiled surface also tame a wet dough without drying it out.
It is a genuine problem only if the dough is wetter than the recipe intended, which happens when flour was mismeasured (scooping packs less flour than a recipe assumes; weigh it), when extra water crept in, or when the dough is badly underproofed and slack. If you truly over-hydrated, add flour a tablespoon at a time and knead fully between additions, rather than burying it in a dry layer. The goal is a dough that is tacky but releases from a clean, dry fingertip.
Pizza dough is too dry, stiff, or crumbly
The fix in one line: add water a teaspoon at a time, knead it in, and let it rest to hydrate fully.
The opposite problem: a dough that will not come together, cracks at the edges when you stretch, or feels hard. Causes are mirror images of the sticky case: too much flour (again, usually from scooping instead of weighing), too little water, or a flour that drinks more than the recipe expected (whole-wheat and some high-protein flours need more water).
The fix is gradual rehydration. Wet your hands or add water by the teaspoon, kneading it fully in before adding more, until the dough is soft and supple but not tacky. Then give it 15 to 20 minutes covered: flour keeps absorbing water after mixing, so a dough that felt stiff often softens on its own once it rests. Next time, weigh your flour with a scale rather than measuring by cup, which is the biggest single source of dry, dense home dough.
Pizza dough sticks to the peel
The fix in one line: dust the peel with semolina or coarse flour, build the pizza fast, and give it a shake before it sits.
Nothing is more frustrating than a topped pizza welded to the peel. The dough sticks because moisture from the dough and sauce seeps into the peel and glues it down, and time makes it worse.
The fixes, in order of impact: dust the peel with semolina or coarse cornmeal, which act like tiny ball bearings under the dough; build the pizza quickly and launch within a minute or two, because a topped pizza that sits will stick; and shake the peel every 20 seconds or so while you top, so you can feel the moment it stops sliding and add a little more semolina under the stuck edge. A wood or composite peel grips less than a thin metal one for launching; many cooks build on wood and retrieve with metal. And do not over-sauce: a soaked center is the most common glue point. Once you have a clean launch, our guide on how to use a pizza stone covers landing the pizza without a crack or a tear.
Crust is gummy or doughy in the middle after baking
The fix in one line: the baking surface was not hot enough; preheat a stone or steel a full hour and bake until the bottom is browned.
A pizza with crisp edges but a pale, doughy, undercooked center is the classic home-oven failure, and it is almost always a heat problem on the bottom, not a dough problem. The crust needs intense, direct bottom heat to set and crisp before the toppings overcook.
Three causes, all fixable:
Cold or under-preheated surface. A pizza stone or steel is a thermal battery, and it needs 45 to 60 minutes at full oven temperature to fully charge, not the 10 minutes most people give it. Launch onto a properly preheated surface and the bottom sets fast. Skipping this is the number one cause of a gummy home crust.
Stretched too thick in the center. A thick middle cannot cook through before the rim burns. Stretch the center thinner and keep thickness even.
Too wet, or too much sauce and topping. Excess moisture steams the center instead of letting it crisp. Go lighter on sauce and wet toppings, and make sure your oven is at its true max (most home ovens hit 500 to 550F). For the full picture, see our breakdown of pizza oven temperature by style, and pull the pizza when the bottom is browned, not just when the cheese looks done.
Crust won’t brown and stays pale
The fix in one line: more heat, more fermentation, and a touch of sugar or oil.
A crust that bakes through but stays blond lacks the browning reactions that need both high heat and residual sugars. If your oven simply does not get hot enough, browning will always lag; run it at maximum with a preheated steel, which transfers heat faster than a stone and browns the bottom better. A longer cold ferment also helps in a roundabout way: as the dough ferments it develops flavor compounds and the surface behaves differently in the heat. A small amount of sugar (around 1 to 2% of flour weight) or a little oil in the dough, as used in New York style crust, gives the surface more to brown with. Finishing a minute under the broiler is the fastest way to add color to a stubborn top.
Bottom burns before the top is done
The fix in one line: raise the rack, lower the surface temperature, and finish the top under the broiler.
The reverse imbalance, a charred bottom under raw cheese, means the bottom heat is outrunning the top. This is common with very hot steels and stones in a home oven. Move the baking surface to a higher rack so the top is closer to the oven’s heat, give the surface a minute to shed a little heat if it is screaming hot, and switch the broiler on to drive the top once the bottom is set. In a home oven, balancing top and bottom heat is the whole game; matching your surface and rack position to the style you are baking, covered in our pizza oven temperature guide, is what gets both done at once.
How long can pizza dough sit out, keep, or freeze?
Storage questions come up constantly, so here are the working numbers.
On the counter: a yeasted dough can sit at room temperature for about 1 to 2 hours of active rise before it risks overproofing, faster in a warm kitchen. Balled dough you plan to bake soon can hold an hour or two at room temperature; beyond that, refrigerate it.
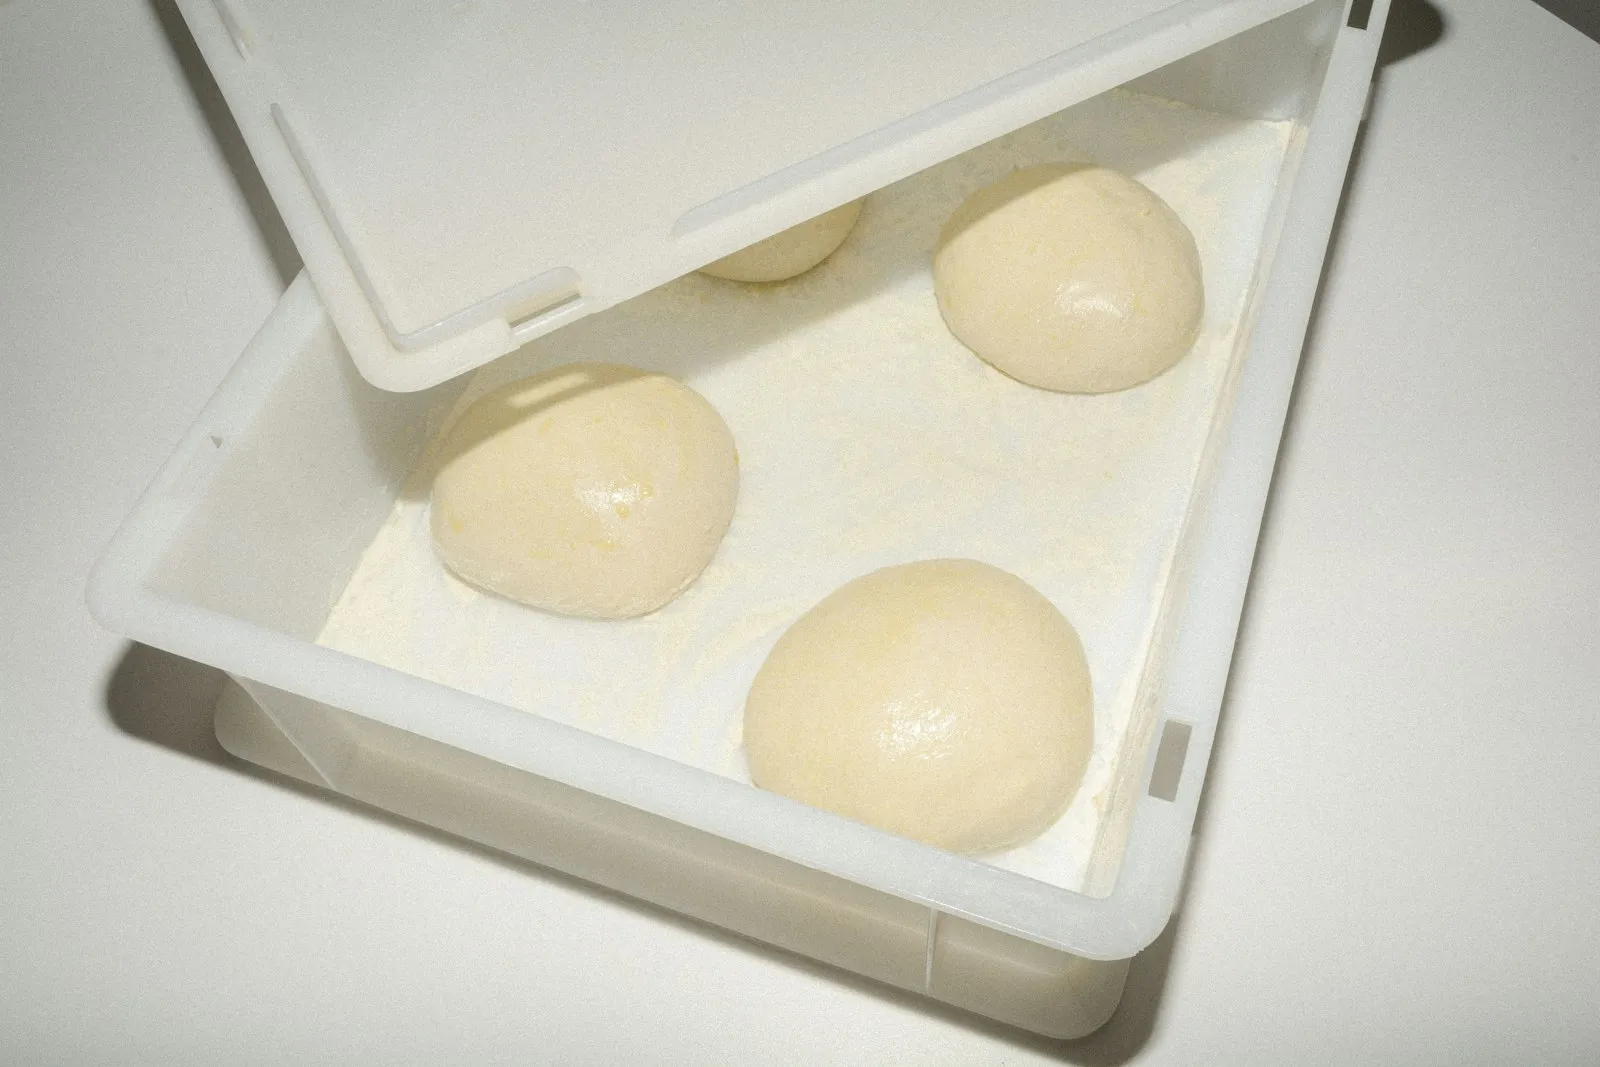
In the refrigerator: cold ferment is the home cook’s best friend. Dough keeps and improves in the fridge for 24 to 72 hours, with three to five days the flavor sweet spot before it starts to degrade and turn slack. Store it lightly oiled in a covered container with room to expand. Pull individual balls 1 to 2 hours before baking so they come to room temperature.
In the freezer: dough freezes well for up to about 3 months. Freeze it after balling, well wrapped, then thaw overnight in the fridge and bring to room temperature before stretching. Freezing pauses the yeast; it does not kill it, so the dough wakes up and rises again as it thaws.
How to tell if pizza dough has gone bad
Refrigerated dough that has turned is easy to read once you know the signs. A little tang and a few surface bubbles are normal and good; these are the hallmarks of healthy fermentation. Worry when you see or smell:
- A sharp, sour, or strongly alcoholic smell beyond a pleasant tang.
- A gray, crusty, or discolored surface, or any spots of mold (fuzzy white, green, or black). Mold means throw it out, no rescue.
- A slack, sticky, overly wet texture that tears into a web, the sign of dough that overfermented well past its window.
- An off, beery taste after baking.
A dough that is merely a bit over its prime (slightly slack, very tangy, no mold) is safe and best repurposed as a flatbread or focaccia. Anything moldy or foul-smelling goes in the bin. When in doubt, the smell test is reliable: fresh dough smells faintly yeasty and sweet, spoiled dough smells sharp and wrong.
What to skip (the bad fixes)
A few popular “fixes” make things worse:
- Dumping flour on sticky dough. It lowers hydration, tightens the crumb, and trades a manageable tacky dough for a dense, dry one. Wet hands and a bench scraper instead.
- Microwaving dough to speed a rise. It creates hot spots that kill yeast and partially cook the dough. Use a warm spot, not active heat.
- Re-kneading overproofed dough hard. Aggressive punching down and rekneading a spent dough will not rebuild structure it has already lost. Gently reball, or repurpose it.
- Rolling dough with a pin for Neapolitan or New York styles. A rolling pin presses out the gas bubbles you fermented to build, leaving a cracker-flat, dense rim. Hand-stretch instead.
- Cranking more yeast to fix slow rising. If the dough is cold or the yeast is dead, more yeast will not help and can push the flavor yeasty and the rise toward overproofing. Fix the temperature and yeast viability first.
You now have the diagnosis, not just the symptom
Pizza dough is forgiving once you can name what went wrong. Nearly every problem on this page is one of four levers, gluten, yeast, hydration, or temperature, drifting off target, and nearly every fix is a small correction plus a little patience. Rest the dough when it fights you, respect the yeast and the clock, weigh your flour, and preheat your surface like you mean it. Diagnose the lever, make the one correction it calls for, and the next pizza will tell you it worked.