Sourdough pizza dough is the slow-fermentation answer to home pizza. You feed a starter, you wait, you mix, you wait some more, you cold-ferment overnight, and the dough comes out of the fridge with a smell that commercial-yeast pizza dough never gets near. The trade-off is time and chemistry: this is not a “have pizza in 90 minutes” recipe. It is the recipe for the home cook who wants the kind of crust a real Neapolitan pizzeria turns out, made with a starter that lives in your fridge, on a 24-hour clock you’ll get used to. Here is the recipe, built at 65 percent hydration with a 24-hour cold ferment, plus the active-starter vs discard decision most articles skip and the honest answer to “do Italians actually use sourdough for pizza?”
TL;DR
- The recipe at a glance: 500g bread flour, 325g water (65 percent hydration), 100g ripe sourdough starter (100 percent hydration, fed 4-6 hours before mixing), 10g fine sea salt. Mix, autolyse 30 min, knead 5 min, bulk 4-6 hours at room temp with 3-4 stretch-and-folds, cold ferment 12-24 hours, divide into 4 x 235g balls, final proof 1-2 hours, bake at 500F (home oven on a pizza steel) or 850-950F (Ooni or Gozney) for 6-10 minutes or 60-90 seconds respectively.
- Ripe starter vs discard: This recipe uses ripe (active, bubbly, peaked) starter as the only leavening. If your starter is unfed, see the discard section below; you’ll add commercial yeast and use a shorter schedule.
- Hydration: 65 percent for home ovens, 70 percent for outdoor pizza ovens. Higher hydration needs higher heat to set the structure before the dough collapses.
- Cold ferment is the flavor lever. Same-day works (6-8 hours), overnight is the sweet spot (12-18 hours), 24-hour cold retard is the considered upgrade, 72-hour pushes flavor to its honest limit.
- Lievito madre and Italian tradition: real Neapolitan pizza is often (not always) made with lievito madre, an Italian stiff sourdough culture. The AVPN protocol allows both lievito madre and commercial yeast. Modern American sourdough pizza is inspired by lievito madre but uses standard 100 percent hydration starter.
- What to skip: all-purpose flour for a 24-hour ferment (gluten breaks down), rolling pin (kills the open crumb the long ferment built), under-feeding the starter (recipe assumes ripe peak), bake temperatures below 475F (the dough needs heat to set the airy structure).
- For the home-oven version, you want a pizza steel, not a stone. Steel conducts heat 4-5x faster, which gets the crust set before the long-ferment dough collapses.
The quick answer (active starter or discard, in 60 seconds)
If your sourdough starter is bubbly, doubled in volume since its last feeding, and passes the float test: use this recipe. Pure sourdough, no added commercial yeast, 24-hour cold ferment for full flavor.
If your starter is unfed (sitting in the fridge, hasn’t been fed in days, no visible activity): that’s discard. Skip down to the discard section. You’ll add a small amount of commercial yeast for the rise and use a shorter schedule. The discard contributes flavor; the yeast does the work.
If you don’t have a starter at all: order a Classic Fresh Sourdough Starter from King Arthur, or get a scoop from a friend who bakes. Feed it according to standard instructions for at least a week before attempting pizza dough.
That distinction is the single biggest source of “my sourdough pizza turned out flat” frustration online. Pick the right recipe for what’s actually in your jar.
What sourdough pizza dough actually is
Sourdough pizza dough is a yeasted dough where the yeast comes from a wild sourdough starter instead of a commercial packet. The same fundamental chemistry that produces a Neapolitan or New York pizza dough is happening (gluten development, fermentation, oven spring), but the leavening agent and the timeline are different.
Lievito madre and the Italian tradition
The traditional Italian sourdough culture is called lievito madre (Italian for “mother yeast”). Unlike the loose 100 percent hydration starter most American home bakers keep, lievito madre is a stiff dough culture: roughly 50 percent hydration, refreshed multiple times per day in a high-end pizzeria, often kept tied in a cloth bundle to control the fermentation. A dried form of the same mother dough is also what pinsa, the modern oval Roman flatbread, leans on for its easier-to-digest pitch.
The AVPN (Associazione Verace Pizza Napoletana), the body that certifies traditional Neapolitan pizza, allows both lievito madre and commercial yeast in its protocol. Many Naples pizzerias use commercial yeast for consistency (a busy pizzeria mixing 200 kilos of dough a day can’t afford starter inconsistency); some high-end pizzerias use 100 percent lievito madre; some blend the two. There is no single “authentic” Naples leavening agent.
What this means for the home cook: modern American sourdough pizza is inspired by lievito madre but uses standard 100 percent hydration starter. The flavor profile is close to lievito madre but the technique is more forgiving. We are not aiming for AVPN certification at home. We are aiming for the open-crumb, complex-flavor pizza that long fermentation produces, with the equipment and starter most home cooks have.
Why sourdough is not strictly “no-yeast” pizza
A common misconception: sourdough pizza is sometimes called “no-yeast pizza.” Not quite. Sourdough starter is full of yeast. It’s just wild yeast (Saccharomyces exiguus and similar strains, along with lactobacillus bacteria) instead of the commercial Saccharomyces cerevisiae in packet yeast. The yeast in your starter is what rises the dough. The lactobacillus bacteria produce the lactic and acetic acid that give sourdough its characteristic tang.
“No yeast pizza dough” is a separate genre, typically using baking powder and water for chemical leavening. It produces a flatbread-like crust with no oven spring. That is not what we’re making here.
How sourdough differs from a cold-fermented commercial-yeast dough
A 24-hour cold-fermented commercial-yeast dough (like our Neapolitan pizza dough recipe) and a 24-hour sourdough dough share most of their flavor benefits. Both develop complex notes through long fermentation. Both break down some gluten and phytic acid. Both produce more digestible bread than a 90-minute commercial-yeast dough.
The differences:
- Sourdough has a more complex flavor profile. The lactobacillus activity adds notes commercial yeast cannot produce.
- Sourdough is slower. A commercial-yeast dough can do same-day in 4-6 hours; sourdough needs at least 12 hours start to finish with a healthy starter.
- Sourdough is more forgiving on long timelines. A 48-hour or 72-hour cold-ferment commercial-yeast dough often over-proofs and goes flat; sourdough can handle 72 hours of cold ferment without collapsing because the wild yeast is slower-acting.
- Sourdough is less forgiving on short timelines. Same-day sourdough is possible but flat-tasting; same-day commercial-yeast dough hits its peak in 4-6 hours.
If you want pizza tonight, use commercial yeast. If you want pizza tomorrow night with the best possible flavor, use sourdough. Both are legitimate. Sourdough is not “better” in some absolute sense; it’s better at a specific thing (flavor through time).
Ingredients (by weight, with baker’s percentages)
Pizza dough is measured by weight, not volume. A kitchen scale that reads to 1-gram resolution is mandatory. The OXO Good Grips 5-lb scale is the workhorse.
The recipe in baker’s percentages
| Ingredient | Weight | Baker’s % |
|---|---|---|
| Bread flour | 500g | 100% |
| Water (room temp, 70F) | 325g | 65% |
| Ripe sourdough starter (100% hydration) | 100g | 20% |
| Fine sea salt | 10g | 2% |
Yields: ~935g total dough, four 235g balls for four 12-inch pizzas.
Optional: 10g (2%) extra-virgin olive oil for a slightly softer crumb. The traditional Neapolitan version skips oil entirely; the New York adaptation includes it. Pick by which pizza style you’re targeting, not by intuition.
Flour: bread flour vs 00 vs all-purpose
The protein content of the flour determines how much gluten the dough can develop, which determines how well it survives a long ferment.
- Bread flour (12.7 percent protein), the default. King Arthur Bread Flour is the canonical pick. Holds up to 24+ hours of fermentation without collapsing. Produces the chewy, slightly tangy crust most American sourdough pizza eaters expect.
- Italian 00 flour (11 to 12 percent protein). King Arthur 00 Pizza Flour or Caputo Pizzeria. Softer, more delicate crumb. Good for outdoor pizza ovens at 850-950F. Marginal in a 500F home oven (the longer bake can over-stress the lower gluten structure).
- All-purpose flour (10 to 11 percent protein). Works for same-day or overnight ferments. Not recommended for 24-hour or longer cold ferments; the gluten breaks down before bake time. See our Neapolitan pizza flour breakdown for the protein hierarchy.
- 00 + bread flour blend. The Gozney pro recipe uses 65/35 (00/bread). The 00 brings softness, the bread flour brings structural support. Worth the extra step for a special bake; not necessary for everyday sourdough pizza.
For the home cook with a pizza steel in a 500F oven, bread flour is the right answer 90 percent of the time. The recipe above assumes bread flour.
Starter: active/ripe vs discard, and the chemistry difference
Ripe (active) starter is starter that has been recently fed, has roughly doubled in volume since the feeding, is visibly bubbly throughout, and passes the float test (drop a teaspoon of starter into a glass of water; if it floats, it’s ripe). This is what the main recipe assumes.
To get ripe starter: feed your starter 4 to 6 hours before mixing the dough, using a 1:1:1 ratio (e.g., 25g existing starter + 25g flour + 25g water). At room temperature (70-75F), the starter will peak (double in volume, then start to fall) in 4-8 hours. Mix the dough when the starter is at peak.
Discard is unfed starter, typically the portion you’d throw away during a routine feeding. It contains live yeast and bacteria but isn’t actively rising. Discard contributes flavor to a dough but doesn’t have the leavening power to rise it alone. The discard recipes (King Arthur’s variant, for example) add commercial yeast to do the actual rise work.
The recipe in this article uses ripe starter only, no commercial yeast. For the discard variant, see the discard section below.
Hydration: 60 to 70 percent, picked by your oven
Hydration is the ratio of water to flour, by weight. 65 percent means 65 grams of water per 100 grams of flour. The right hydration for sourdough pizza depends on the oven:
| Oven | Bake time | Recommended hydration |
|---|---|---|
| Home oven, 500-550F, on pizza steel | 6-10 minutes | 60-65% (recipe default) |
| Home oven, 500F, on pizza stone | 7-12 minutes | 60-62% (slower bake = drier start needed) |
| Outdoor pizza oven, 850-950F | 60-90 seconds | 65-70% |
| Cast-iron skillet, 500F + broiler | 5-8 minutes | 60-65% |
The recipe above is calibrated for 65 percent in a home oven on a pizza steel. For an outdoor pizza oven like the Ooni Koda 16 or Karu 2 Pro, bump the water from 325g to 350g (70 percent hydration). See the Ooni-oven adjustment below.
Salt and the optional olive oil
Salt at 2 percent is the standard. Below 1.5 percent the dough tastes flat. Above 2.5 percent the salt starts to inhibit yeast activity and the rise stalls.
Fine sea salt is the easiest to dissolve evenly in the dough. Avoid iodized table salt (the iodine can interfere with starter activity in trace amounts).
Olive oil is optional. The traditional Italian-Neapolitan style omits it. American-style sourdough pizza often includes 2 percent oil for a softer crumb that holds up better when toppings are dense. Both versions are legitimate.
The recipe: 24-hour cold ferment, bread flour
This is the recipe we recommend. Yields four 235g dough balls, enough for four 12-inch pizzas.
Step 1: Feed your starter (the night before mixing)
The night before you plan to mix the dough (or 4-6 hours before, depending on your starter’s vigor), feed your starter using a 1:1:1 ratio:
- 25g existing starter
- 25g bread flour (or whatever flour your starter is maintained on)
- 25g warm water (75-80F)
Mix in a clean jar. Cover loosely (a coffee filter held by a rubber band works; don’t seal it airtight). Leave at room temperature (70-75F) until the starter has roughly doubled in volume and is bubbly throughout. This takes 4-8 hours depending on starter vigor and room temperature.
Float test: drop a teaspoon of starter into a glass of cool water. If it floats, the starter is at peak and ready. If it sinks, give it another hour and re-test.
The recipe needs 100g of ripe starter, so feed enough to leave you with 100g plus some leftover (feed 60g + 60g + 60g = 180g total for a healthy buffer).
Step 2: Mix and autolyse
Once the starter passes the float test, mix the dough.
In a large bowl, combine:
- 500g bread flour
- 325g water (room temp, 70F)
Mix with a wooden spoon or your hand until the flour is fully hydrated and no dry patches remain. The dough will be shaggy and rough. Cover and rest 30 minutes (this is the autolyse, which gives the flour time to hydrate and start gluten development without effort).
After the autolyse, add:
- 100g ripe sourdough starter (at peak)
- 10g fine sea salt
Pinch and squeeze the starter and salt through the dough by hand for 2-3 minutes until fully incorporated. The dough will become more elastic as the gluten develops. Don’t worry about smoothness yet; that comes during bulk fermentation.
Step 3: Bulk fermentation with stretch-and-folds (4-6 hours at room temp)
Bulk fermentation is where the dough rises and develops flavor and structure. At 70-75F room temperature, expect 4-6 hours of bulk fermentation. The dough should approximately double in volume (not strictly double; 60-80 percent increase is fine for sourdough).
During bulk fermentation, perform 3 to 4 stretch-and-folds, roughly 30-45 minutes apart:
- Wet your hand lightly. Reach under the dough on one side, lift it up, and fold it over the top.
- Rotate the bowl 90 degrees and repeat.
- Do this 4 times (one fold per “side” of the dough).
- Cover and rest 30-45 minutes.
- Repeat 2-3 more times.
The stretch-and-folds build gluten structure without aggressive kneading. After the final fold, the dough should be visibly smoother and have some tension on the surface.
Bulk is done when:
- The dough has risen by 60-80 percent in volume
- The surface is smooth and slightly domed
- The edges pull away from the bowl when you tilt it
- You can poke the dough gently and the dimple springs back slowly (not instantly, not slowly fading)
Step 4: Cold retard (12 to 24 hours in the fridge)
Once bulk is complete, transfer the entire dough mass (still in the bowl, covered with plastic wrap or a damp towel) to the refrigerator. Cold retard for:
- 8-12 hours if you want pizza for lunch the next day (decent flavor, time-saving)
- 12-18 hours if you want pizza for dinner the next day (the sweet spot)
- 24 hours if you want maximum flavor (the considered upgrade)
- 48-72 hours if you’re going for the obsessive flavor max (the surface will look slightly bubbled and may have a faint film, which is normal)
Past 72 hours, the dough’s gluten structure starts to degrade and the pizza turns out flat. 24 hours is the sweet spot for most home cooks. The 4 fermentation schedules below cover the trade-offs.
Step 5: Divide and shape into balls
Pull the dough from the fridge. Do not punch it down or knead it. That deflates the structure you spent 24 hours building.
Lightly flour a work surface. Dump the dough out (it should release from the bowl cleanly; if not, slide a wet spatula around the edge). The dough will be cold and somewhat extensible.
Using a bench scraper or sharp knife, divide into 4 equal pieces, ~235g each. Use the kitchen scale; eyeballing is not accurate enough.
To shape each piece into a ball:
- Fold the four edges of the piece into the center, like tying a small bundle.
- Flip the piece so the smooth side is up.
- Cup your hand around the piece and drag it across the work surface in small circles. The friction will pull the surface taut.
- The result should be a smooth, tight ball with the seam tucked on the bottom.
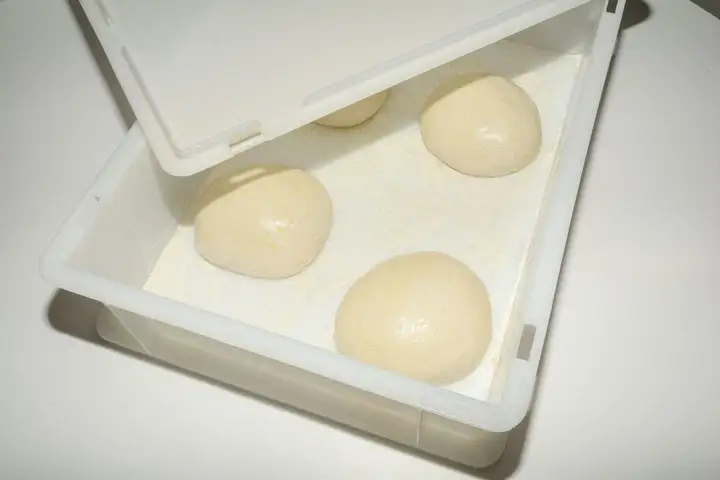
Place each ball on a lightly floured surface or in an Ooni dough proofing box (or any sealed container with a lid). Leave space between balls; they will expand.
Step 6: Final proof and bake
Final proof at room temperature (70-75F) for 1 to 2 hours. The balls should expand by about 50 percent and feel airy and slightly jiggly when touched.
For the bake, follow our home-oven adaptation or outdoor pizza oven sections below.
Alternative schedules (same-day, overnight, 72-hour)
The 24-hour cold ferment is the default. Three honest alternatives:
Same-day sourdough (6-8 hours total)
Feed your starter in the morning. When it peaks (4-6 hours later), mix the dough. Bulk ferment 3-4 hours at warm room temperature (75-80F). Skip the cold retard. Shape and bake immediately.
Flavor: flatter than a cold-fermented version. The lactic and acetic acid notes don’t have time to develop. Texture: rises fine but the crumb is more uniform and less open. Use this when you want sourdough pizza tonight and have a healthy active starter. Decent but not the peak.
Overnight cold ferment (12-18 hours)
Mix in the evening, bulk 4-6 hours at room temp, cold retard 12-18 hours, divide and bake the next afternoon or evening. This is the Alexandra Stafford sweet spot, and it’s our recommended schedule for most home cooks. Flavor is meaningfully better than same-day. The 24-hour cold ferment above is functionally the same schedule with a few more hours in the fridge for slightly more flavor depth.
72-hour cold ferment (the max-flavor schedule)
Mix and bulk as normal. Cold retard for 72 hours. The dough surface will look bubbled and may have a faint white film (a thin layer of yeast film, harmless). The flavor at 72 hours is markedly more complex than at 24, with stronger lactic and acetic acid notes (more “tang”). The trade-off: the gluten structure is more delicate, so you have to be gentler when shaping, and the dough is harder to launch off a peel without tearing.
Past 72 hours, returns diminish sharply and the dough often goes too far (loose structure, vinegar notes overwhelm the wheat flavor). 72 hours is the practical maximum.
How to bake sourdough pizza
In a home oven on a pizza steel
The setup that gets you closest to authentic in a 500-550F home oven:
- Preheat the oven with a pizza steel on the top rack (about 6 inches below the broiler element). Preheat at maximum temperature (500-550F depending on your oven) for at least 45 minutes. The steel needs to reach surface equilibrium; the timer is not the indicator (use an infrared thermometer if you have one and aim for 500F+ surface).
- Stretch each dough ball into a 10 to 12-inch round on a semolina-dusted peel. The dough should stretch easily because it has been hydrated and fermented properly; if it springs back aggressively, let it rest 10 minutes and try again.
- Top quickly. A no-cook tomato sauce (see our pizza sauce recipe for both the Neapolitan no-cook and American cooked versions), fresh mozzarella (drained and patted dry), and toppings. Don’t overload; sourdough pizza wants less topping volume than a NY slice.
- Turn on the broiler 5 minutes before launching the pizza. This pre-heats the top heating element.
- Launch the pizza onto the steel. Bake with broiler ON for 3-4 minutes (top browning), then switch to bake mode for 2-4 more minutes until the bottom is golden and the cheese is bubbly with some brown spots.
- Total bake time: 6 to 10 minutes depending on oven and topping load.
The 525°F + broiler combination approximates a NY-style commercial deck oven. The crust will be chewy, slightly tangy from the sourdough, and have an airy crumb with visible holes.
In an outdoor pizza oven (Ooni, Gozney)
For the Ooni Koda 16, the Karu 2 Pro, the Gozney Roccbox, or any oven that hits 850-950F:
- Bump the hydration to 70 percent (350g water instead of 325g for the 500g flour recipe). The shorter bake at higher heat sets the structure before the higher water content can collapse it. Below 65 percent, the dough comes out cracker-textured at 900F.
- Stretch to 10-12 inches. A larger pizza is hard to manage at 900F because the bake time is so short.
- Preheat the oven to 850-950F floor temperature. Use an infrared thermometer to verify; the dial is not accurate.
- Launch, rotate every 20-30 seconds with a turning peel, total bake 60-90 seconds. The crust should leopard-spot (those dark blistered spots on the rim) within the first 30 seconds.
- The shorter bake produces a more delicate crumb than the home-oven version, closer to true Neapolitan.
This is the gold-standard sourdough pizza bake. See our best wood-fired pizza oven guide for the tier-by-tier oven breakdown if you’re shopping.
In a cast-iron skillet (no stone or steel needed)
The home-oven alternative when you don’t have a pizza steel or stone. This is how Amy Duska at Little Spoon Farm does it (rank #2 on the SERP for this query):
- Preheat the oven to 500F with an empty 10 or 12-inch cast-iron skillet inside, on the middle rack, for 30 minutes.
- Stretch one dough ball into a 10 to 12-inch round on parchment paper (the parchment lets you transfer the dough into the hot skillet without burning yourself).
- Pull the skillet out, lift the parchment with the dough onto the hot skillet. Top quickly.
- Return to the oven on the middle rack for 5-7 minutes, then move to the top rack and turn on the broiler for the final 1-2 minutes.
- Total bake: 8-10 minutes. The cast-iron version produces a thicker, more bread-like crust than the steel version, closer to a Detroit-Neapolitan hybrid.
Decent fallback if you don’t own a pizza steel and don’t want to buy one. The crust character is different (denser, more focaccia-adjacent) but the flavor is the same.
What if you’re using discard instead of ripe starter
Sourdough discard is unfed starter, the portion you’d otherwise throw away during a routine feeding. It contributes flavor to a dough but doesn’t have the leavening power to rise it alone.
If your starter is unfed and you don’t have time to feed it 4-6 hours ahead, use a discard recipe instead. The honest version (close to King Arthur’s sourdough discard pizza crust, which is rank #4 on the SERP):
| Ingredient | Weight |
|---|---|
| Bread flour | 500g |
| Water (warm, 90-100F) | 325g |
| Sourdough discard (unfed) | 120g |
| Instant yeast | 3g |
| Fine sea salt | 10g |
Schedule: mix everything together, knead 5-7 minutes, bulk ferment 2-4 hours at warm room temperature (the discard contributes flavor while the commercial yeast does the rise), divide and shape, final proof 1 hour, bake as above.
This is sourdough-discard pizza, not pure sourdough pizza. You get the flavor benefit of the discard plus the speed of commercial yeast. Total time: 4-6 hours from mix to bake.
When to use discard + yeast vs ripe-starter pure sourdough:
- Use ripe-starter pure sourdough when: you have an active starter, you want maximum flavor, you have 24 hours of timeline
- Use discard + yeast when: your starter is unfed and you don’t want to feed it just for one pizza, you want pizza tonight, you don’t mind that this is technically not “true” sourdough pizza
Both are legitimate. Don’t let purists tell you discard + yeast is fake sourdough; it’s a different recipe with different trade-offs.
What we would skip
The recurring mistakes that produce a flat sourdough pizza:
All-purpose flour for a 24-hour cold ferment
All-purpose flour (10-11 percent protein) doesn’t have enough gluten to hold up to 24 hours of fermentation. The gluten breaks down before bake time and the pizza comes out flat with no oven spring. If you only have all-purpose, do a same-day or overnight (12-hour) schedule instead of 24-hour cold ferment. Better still: spend $7 on bread flour.
Under-fed starter
The recipe assumes 100g of starter at peak. If your starter hasn’t doubled since its last feeding, it doesn’t have the yeast population to rise the dough properly. Feed and wait for the float test before mixing. A common mistake is using starter “because it looks bubbly” without verifying it’s actually at peak.
Rolling pin
A rolling pin compresses the dough and squeezes out the gas pockets you spent 24 hours developing. The dough goes flat and stays flat. Stretch by hand using the technique in our how to stretch pizza dough guide.
Bake temperatures below 475F
Sourdough pizza dough wants high heat to lock in the airy structure. Below 475F, the dough has time to over-relax in the oven before the crust sets, and the crumb collapses. If your oven won’t go to 500F, you’ll get a denser crust. Push the oven to its max regardless.
Punching down the dough after cold retard
You’ll see this in older recipes: “punch down the dough to release the air.” For sourdough pizza, this is wrong. The air you punch out is the air you want in the finished pizza. Treat cold-retarded dough gently; just divide and shape, don’t deflate.
Going past 72 hours of cold ferment
Past 72 hours, the gluten breaks down faster than the wild yeast can compensate, the dough turns into a sticky slack mess, and the acid notes (acetic, vinegar-adjacent) overpower the wheat flavor. 24 hours is the sweet spot. 72 is the maximum. Past that is bread science research, not pizza.
Using fresh mozzarella without draining it
Fresh mozzarella holds a lot of water. Slice it, lay it on paper towels, and pat dry before topping. Wet fresh mozz will soak the dough and produce a soggy bottom even with the high-heat bake.
Frequently asked questions
Does sourdough work for pizza dough?
Yes, sourdough works exceptionally well for pizza dough. The long fermentation (12 to 24 hours typical, up to 72 for maximum flavor) develops more complex flavor than a commercial-yeast dough, breaks down some gluten and phytic acid for easier digestion, and produces an airier crumb with characteristic open holes. The traditional Neapolitan technique often uses lievito madre, an Italian stiff sourdough culture. The recipe above uses 65 percent hydration, bread flour, 20 percent ripe starter, and a 24-hour cold ferment for the home-oven sweet spot.
Do Italians use sourdough for pizza?
Some do, some don’t. Traditional Neapolitan pizza often uses lievito madre (Italian for “mother yeast”), a stiff sourdough culture maintained at around 50 percent hydration. The AVPN (Associazione Verace Pizza Napoletana, the body that certifies traditional Neapolitan pizza) protocol allows both lievito madre and commercial yeast. Many Naples pizzerias use commercial yeast for consistency; some high-end pizzerias use 100 percent lievito madre; some blend the two. Modern American sourdough pizza is inspired by lievito madre but uses standard 100 percent hydration starter and is not strictly identical to the Italian tradition.
Is sourdough pizza healthier than regular pizza?
Marginally. Long fermentation (sourdough or a 24-hour cold-fermented commercial-yeast dough) breaks down some gluten and reduces phytic acid, which may be easier on sensitive digestion. Sourdough also has lactobacillus activity that contributes a slightly lower glycemic index. The effects are real but small. A 24-hour cold-fermented yeast dough achieves similar digestive benefits without sourdough’s complexity. The flavor and texture benefits of sourdough are more meaningful than the health benefits. If you have specific gluten sensitivity (not celiac), long-fermented dough of either type often works better than commercial bread.
What is the difference between sourdough pizza dough and sourdough discard pizza dough?
Sourdough pizza dough uses ripe (active, bubbly, peaked) starter as the only leavening; the rise comes entirely from the wild yeast and bacteria in the starter, which means longer fermentation (12 to 24 hours typical). Sourdough discard pizza dough uses unfed starter (the portion you’d otherwise throw away during a feeding) PLUS commercial yeast for the actual rise; the discard contributes flavor but not lift, which means a faster 2 to 4 hour total time. Use ripe starter when you want pure sourdough chemistry and maximum flavor. Use discard plus yeast when you have an unfed starter you don’t want to waste and you want pizza tonight, not tomorrow.
What hydration is best for sourdough pizza dough?
60 to 65 percent for a home oven (500 to 550F), 65 to 70 percent for an outdoor pizza oven (Ooni, Gozney, 850 to 950F). Lower hydration in the home oven because the longer bake at lower temperature evaporates less water; the dough needs to start drier or it bakes into a chewy mass. Higher hydration in the high-heat oven because the 60 to 90 second bake locks in the structure before too much steam can collapse it. Most home cooks should start at 65 percent. The recipe above is calibrated for 65 percent in a home oven with a pizza steel.
Can I make sourdough pizza dough in one day (same-day sourdough)?
Yes, but the flavor will be flatter. Same-day sourdough takes 6 to 8 hours from mix to bake: feed your starter in the morning, mix the dough when the starter peaks (4 to 6 hours later), bulk ferment 3 to 4 hours at warm room temperature (75 to 80F), shape and bake. The dough rises, but the long-fermentation flavor compounds (esters, lactic and acetic acid notes) don’t have time to develop. For real sourdough flavor, the 24-hour cold ferment is the sweet spot. Same-day is a fine fallback when you want sourdough pizza tonight and have an active starter to deploy.
Related reading
This article covers the dough; for the rest of the system see our Neapolitan pizza dough recipe (the commercial-yeast cold-ferment equivalent), our Ooni pizza dough recipe (same 4-schedule framework applied to gas-oven Neapolitan), and Neapolitan pizza flour for the protein and W-rating breakdown. For sauce: our pizza sauce recipe covers both the no-cook Neapolitan version (which pairs naturally with sourdough) and the American cooked version. For technique: how to stretch pizza dough is the launch step that ruins more home pizzas than any oven decision. For oven: pizza stone vs steel covers the home-oven gear, and our Ooni Karu 2 Pro review and Ooni Koda 16 review cover the outdoor pizza oven options.
What this earns you
You now have the sourdough pizza dough recipe that the SERP keeps splitting in half (the ripe-starter authority article and the discard-plus-yeast convenience article). 65 percent hydration, bread flour, 100g ripe starter, 24-hour cold ferment, 4 dough balls, baked at 500F on a pizza steel or 850-950F in an outdoor oven. The recipe will produce a pizza with the open chewy crumb and complex slightly-tangy flavor that no commercial-yeast dough can match. The first attempt will likely come out 80 percent of where you want it; the third will hit. Feed the starter, mix the dough, wait the 24 hours, and the pizza that comes out is the one you’ve been chasing since you started reading recipe blogs.