You bought an Ooni, you made the official 3-hour dough recipe printed in the manual, and the result was a perfectly fine pizza that did not taste like the pies you remember from Naples or even a good Brooklyn slice shop. This is the Ooni pizza dough recipe that explains why, with four schedule variants (same-day, overnight, classic cold ferment, poolish) and the hydration chemistry that every other Ooni pizza dough recipe on the internet glosses over. The 60 percent hydration target comes from the published side-by-side testing in Modernist Pizza and Kenji Lopez-Alt’s Serious Eats outdoor-oven work, both cited below.
TL;DR
- Hydration: 60 percent. Lower than the 65 to 70 percent you use in a home oven. The Ooni bakes too fast (60 to 90 seconds) for higher-hydration dough to give up its moisture and oven-spring properly.
- Flour: Tipo 00. Caputo Pizzeria (red bag) is the standard. King Arthur Bread Flour at 12.7 percent protein is the best substitute.
- Salt: 2.5 percent. Yeast: 0.3 percent for same-day, 0.15 percent for cold ferment.
- Ball size: 250 grams for 12-inch pizzas, 330 grams for 16-inch pizzas.
- Four schedules. Same-day (3 to 4 hours, Ooni’s official method, the worst of the four). Overnight (mix evening, ball, fridge, warm in morning, eat at dinner). Classic cold ferment (24 to 48 hours fridge, best balance of effort and flavor). Poolish (18-hour preferment plus 4-hour final dough, Modernist Pizza approach, the deepest flavor).
- Stretch by hand, never roll. A rolling pin deflates the gas bubbles that give Neapolitan crust its airy texture.
- Launch with semolina, not cornmeal. Cornmeal scorches at 900F and tastes burnt.
- Cook 60 to 90 seconds at 900F+ with rotations every 20 to 30 seconds.
- What to skip: high-hydration home-oven recipes, all-purpose flour as a default, water hotter than 110F, rolling pins, cornmeal on the peel.
Who this recipe is for
You own an Ooni Koda 12, Koda 16, Koda 2 Pro, Karu 12, Karu 16, Volt 2, or any other home pizza oven that hits 900F or above. You have made dough that came out either gummy on the bottom or tough in the middle, and you suspect (correctly) that the issue is hydration or flour or schedule, but no recipe online tells you which. You want one recipe with four schedule options so you can pick based on whether you are eating pizza tonight or planning a weekend pizza party.
If you bake pizza in a 500F home oven without a pizza oven, this is not the recipe you want. Home ovens take 4 to 6 minutes to bake a pizza, which gives high-hydration dough time to evaporate. Use a 65 to 70 percent hydration recipe instead. See our Neapolitan pizza dough recipe for the home-oven version.
Why this Ooni pizza dough recipe sits at 60 percent hydration
Every Ooni pizza dough recipe worth following lands at 60 percent hydration. The reason is physics, not preference.
Hydration is the ratio of water to flour, by weight. A dough with 600 grams of flour and 360 grams of water is 60 percent hydration (360 divided by 600 equals 0.60). A dough with 600 grams of flour and 420 grams of water is 70 percent hydration. The difference looks small on paper. In the oven it is enormous.
When you slide a pizza into a 900F Ooni chamber, two things happen at once. The water in the dough starts to evaporate (steam pushes the dough upward, creating “oven spring,” the airy expansion that makes Neapolitan crust pillowy). And the proteins in the flour set, locking the structure in place. The bake takes 60 to 90 seconds at most. After that the crust is fixed and no more rise is possible.
At 65 to 70 percent hydration, designed for a 4 to 6 minute home oven bake, the dough does not have enough time to evaporate its water before the crust sets. You get a pizza with a gummy, underbaked bottom and a heavy crumb that never developed its bubbles. At 60 percent hydration, the smaller water load can evaporate in the 60 to 90 second window, and the crust springs the way it should.
Modernist Pizza (Nathan Myhrvold’s exhaustive three-volume work on pizza science) goes deeper on this and lands at 58 to 62 percent for wood-fired and gas-fired home ovens. Kenji López-Alt’s pizza work at Serious Eats tests hydrations in side-by-side bakes and reaches similar conclusions. The 60 percent number is not arbitrary. It is the answer at high heat.
The base recipe in baker’s percentages
Baker’s percentages express each ingredient as a percent of the flour weight. Flour is always 100 percent. This lets you scale to any number of pizzas without recalculating ratios.
| Ingredient | Baker’s % | For 4 pizzas (12”) | For 3 pizzas (16”) |
|---|---|---|---|
| 00 flour | 100% | 600 g | 600 g |
| Water (warm, 95F to 105F) | 60% | 360 g | 360 g |
| Salt (fine sea salt) | 2.5% | 15 g | 15 g |
| Yeast (instant) | 0.3% same-day, 0.15% cold ferment | 1.8 g same-day, 0.9 g cold ferment | 1.8 g same-day, 0.9 g cold ferment |
For 4 pizzas at 12 inches you need 4 balls at 250 grams (about 240 grams of dough plus a little extra to account for water loss in the bowl, so 600 grams of flour plus 360 grams of water gets you there). For 3 pizzas at 16 inches you need 3 balls at 330 grams (same 600 grams of flour total, divided differently).
To scale, multiply every line by your flour multiplier. For 6 pizzas at 12 inches, use 900 grams of flour, 540 grams of water, 22.5 grams of salt, 2.7 grams of yeast (same-day) or 1.35 grams (cold ferment).
Ingredients: what to buy and why
Flour
Caputo Pizzeria (red bag) is the canonical Italian 00 flour for Neapolitan pizza. 12.5 percent protein, finely milled, slightly more elastic than other 00s. Most pizzaiolos and most serious home cooks use it. Available on Amazon and at most Italian grocers in the US.
Antimo Caputo Chef’s Flour (blue bag) is the same mill, slightly lower protein (12 percent), softer. Slightly less elastic dough. Both work; the red bag is closer to Neapolitan specification.
King Arthur 00 Pizza Flour is American-made and easier to find than the Italian options. 12 percent protein. Works as a direct substitute.
Bread flour at 12 to 13 percent protein. If you cannot find 00, King Arthur Bread Flour (12.7 percent) is the most common and most-recommended substitute. The crust will be slightly chewier and less tender than 00, but the difference is small.
All-purpose flour. Works in a pinch (10 to 11 percent protein), but produces a denser crust with less oven spring. Use only if you have nothing else.
Avoid: self-rising flour, whole wheat flour (these change the chemistry entirely and need different recipes), bleached cake flour.
Water
Warm tap water, 95F to 105F. The yeast wakes up faster at body temperature. Water above 120F kills yeast. Water below 70F slows fermentation enough to matter on a same-day schedule.
Filtered or bottled water is unnecessary unless your tap water is heavily chlorinated. If it is, let a pitcher sit uncovered for an hour to dechlorinate.
Yeast
Instant dry yeast (SAF Red or Fleischmann’s RapidRise) is the easiest. Mix directly into the flour, no proofing needed.
Active dry yeast works but needs to be dissolved in warm water for 5 to 10 minutes before mixing. Multiply the instant-yeast quantity by 1.25 to convert.
Fresh yeast (the compressed cake kind, sold in specialty Italian shops) is what Italian pizzaiolos prefer. Multiply the instant-yeast quantity by 3 to convert. Hard to find in the US.
Salt
Fine sea salt or fine kosher salt dissolves cleanly into the dough. Avoid coarse salt; it does not dissolve fully and you get hot spots of saltiness.
Equipment
The non-negotiables and the optionals.
Non-negotiable:
- Kitchen scale that reads in 1-gram increments. Volume measurements (cups, tablespoons) are unreliable for flour. A 1-cup measure can hold 120 grams or 150 grams of flour depending on how packed it is. The whole recipe falls apart without a scale. The OXO Good Grips 5lb scale is the workhorse.
- Infrared thermometer for reading stone temperature in the Ooni. A TempPro TP30 (formerly ThermoPro) is fine. Without one you are guessing whether the stone is at launch temperature.
- A wood or composite pizza peel (14 inches max, will not fit through a Koda 16’s mouth if it’s wider). Wood does not stick to dough the way metal does.
- A metal turning peel (8 to 9 inches) for rotating mid-bake.
Optional but useful:
- Stand mixer with dough hook. Knead-by-hand works fine, takes 10 minutes. Stand mixer takes 8 minutes and your hands stay clean.
- Plastic dough containers with lids. For cold ferment schedules. Cambro 6-quart containers are the restaurant-supply standard.
- Bench scraper for dividing the dough cleanly.
Schedule 1: Same-day (3 to 4 hours)
This is Ooni’s official recipe. Use it when you want pizza tonight and did not plan ahead.
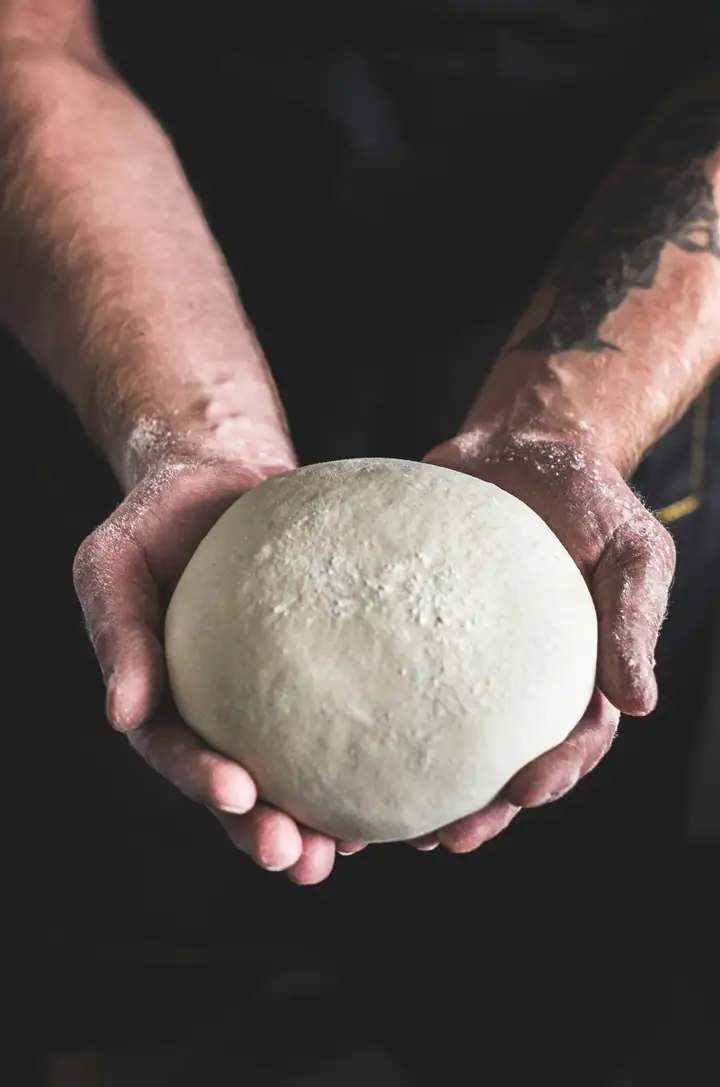
- Mix (10 minutes). Combine 360g warm water, 1.8g instant yeast, and 15g salt in a bowl. Stir until dissolved. Add 600g 00 flour. Stir with a wooden spoon or stand-mixer dough hook until a shaggy mass forms.
- Rest 15 minutes. Cover the bowl. This is an autolyse: the flour hydrates and the gluten starts to develop on its own.
- Knead 8 to 10 minutes. By stand mixer on low speed, or by hand on a lightly floured surface. The dough should go from shaggy to smooth and elastic. Pull a piece thin between your fingers; if it stretches to translucent without tearing, the gluten is developed enough.
- Bulk ferment 1.5 to 2 hours. Cover the bowl with a damp towel or cling film. Leave at room temperature until the dough has roughly doubled in size.
- Ball. Turn the dough onto a lightly floured surface. Divide into 4 pieces of 240 to 250g (for 12-inch pizzas) or 3 pieces of 330g (for 16-inch pizzas). Round each piece by tucking the edges under and rolling on the bench until the surface is taut.
- Secondary rise 30 to 60 minutes. Place each ball in a separate floured bowl or covered tray. Cover and rest at room temperature until visibly puffed.
- Stretch, launch, bake. See sections below.
The same-day method works. It just does not have the flavor depth of any of the longer schedules. The bulk ferment is too short for the enzymatic reactions that develop complex flavor in a dough.
Schedule 2: Overnight (12 to 16 hours)
The schedule to use for weeknight pizza. Mix the dough at 7 or 8 pm, eat pizza the next evening at 6 or 7 pm. Hands-on time: about 12 minutes total.
- Mix and knead as above but use only 0.9g yeast instead of 1.8g.
- Bulk ferment 30 minutes at room temperature.
- Ball. Same procedure as same-day.
- Cold ferment 12 to 16 hours. Place balls in a covered container or individually in plastic-wrapped bowls and refrigerate.
- Pull from fridge 2 to 4 hours before pizza time. The dough needs to come to room temperature and finish proofing. In a cold kitchen, lean toward 4 hours; in a warm kitchen, 2 hours.
- Stretch, launch, bake.
The overnight version has noticeably more flavor than same-day. The slow cold rise gives the yeast more time to consume sugars and produce flavor compounds, and the long fermentation breaks down some of the starches enzymatically.
Schedule 3: Classic cold ferment (24 to 48 hours)
The schedule we recommend for any planned pizza night. Hands-on time: about 12 minutes total. Mix Friday evening for Saturday or Sunday dinner. The best balance of effort and flavor among the four schedules.
- Mix and knead as above with 0.9g yeast.
- Bulk ferment 30 minutes at room temperature.
- Ball. Same procedure.
- Cold ferment 24 to 48 hours in the fridge.
- Pull from fridge 2 to 4 hours before pizza time to warm and finish proofing.
- Stretch, launch, bake.
At 24 to 48 hours, the flavor development is substantially deeper than same-day or overnight. The dough also becomes easier to stretch because the gluten has had time to relax. If you have ever made a pizza where the dough fought you and snapped back every time you stretched it, the fix is usually a longer cold ferment.
We do not recommend going past 48 hours. Past 72 hours, the dough starts to overproof and the gluten breaks down. You get a slack, tearing dough with sour flavors from extended fermentation. The window is 24 to 48 hours; the sweet spot is 36.
Schedule 4: Poolish (18-hour preferment plus 4-hour final dough)
The advanced version, derived from Modernist Pizza’s techniques. A poolish is a 100 percent hydration preferment (equal weights of flour and water with a tiny amount of yeast) that ferments for 14 to 18 hours before being mixed into the final dough. Use it when you want maximum flavor complexity.
Step 1, the poolish (the night before):
- 100g 00 flour
- 100g water (room temperature)
- 0.1g instant yeast (a pinch, less than a quarter teaspoon)
Mix until smooth. Cover loosely (a poolish needs some air exchange). Leave at room temperature for 14 to 18 hours. It will rise dramatically, become very bubbly, then collapse partially when ripe. That collapse is the signal it is ready.
Step 2, the final dough (the next day):
- All the poolish from step 1
- 500g 00 flour
- 260g water (warm, about 100F)
- 15g salt
- 0.5g instant yeast
Mix the poolish with the water until dispersed. Add the flour and salt. Mix until shaggy. Rest 15 minutes (autolyse). Add the remaining yeast. Knead 8 to 10 minutes until smooth and elastic.
Bulk ferment 30 minutes. Ball. Secondary rise 2 to 3 hours at room temperature until visibly puffed.
Stretch, launch, bake.
The poolish version has the deepest, most complex flavor of any of the four schedules. The texture is also slightly more open and airy. The trade-off is the planning: you need to start the preferment the night before, and the next-day final-dough cycle still takes 4 hours.
Stretching technique
After the secondary rise, the dough is ready to stretch. Do not use a rolling pin. A rolling pin compresses the gas bubbles that the fermentation built up, which destroys the airy crumb that defines Neapolitan-style pizza.
- Lightly flour the dough ball and your hands. A thin dusting of 00 flour is enough; too much makes the surface slippery and harder to launch.
- Press the dough into a flat disc with your fingertips. Push from the center outward, leaving the outer edge slightly thicker. That outer ring becomes the cornicione (the puffy crust rim) after the bake.
- Pick up the dough and drape it over your knuckles. Both hands, both fists. Rotate the dough slowly, letting gravity pull it down and out. Five or six rotations gets you to a 12-inch disc; eight or nine to 16 inches.
- Stop while the center is still slightly thicker than tissue paper. If you can see clearly through the center, you have stretched too far and it will tear during the launch.
If the dough resists stretching and snaps back, it has not relaxed enough. Set it down, cover, wait 10 minutes, try again. This usually happens with same-day dough; cold-fermented dough is more forgiving.
Launching technique
The single most-failed step in home pizza is the launch off the peel. The dough sticks, you panic, you shove harder, and the pizza folds into a calzone halfway into the oven.
- Dust the wood peel with semolina, not flour. Semolina rolls under the dough like ball bearings. Flour absorbs moisture from the dough and glues it to the peel.
- Place the stretched dough on the peel before topping. Build the pizza fully on the peel.
- Test-shake the peel. Before you walk it to the oven, give the peel a small, decisive forward-and-back shake. If the pizza slides easily, you are good. If it sticks, gently lift the sticky edge with your fingers and add more semolina underneath.
- Launch with a single decisive motion. Tilt the peel about 20 degrees toward the stone. Move the peel forward over the stone, then snap it back. The pizza should slide off cleanly.
Practice with cheap dough before you waste a real pie. Most people get the launch on the second or third try.
Baking
Stone target temperature is 750F before launching the first pizza, measured with an IR thermometer pointed at the front of the stone (the spot furthest from the burner). See our Ooni Koda 16 review for the preheat-time discussion. Most Ooni models lie about preheat time; expect 25 to 40 minutes from cold start, not the 15 minutes the marketing claims.
- Drop the burner to low about 90 seconds before launch. The flame is so aggressive on high that toppings burn before the crust catches up. Low lets the bake balance.
- Launch. Pizza on the stone.
- Rotate 90 degrees every 20 to 30 seconds. Use a metal turning peel. The pizza will look uneven for the first rotation; that is normal. By rotation four, it evens out.
- Pull at 60 to 90 seconds. Look for leopard-spotted leoparding (dark brown irregular spots) on the crust rim and fully melted, slightly bubbling toppings.
If the bottom is pale and the top is fully browned, your stone was not at temperature; wait longer next time. If the bottom is charred and the top is undercooked, the burner was too high during the bake; drop to low sooner.
Troubleshooting: the 6 most common failures
1. Dough is too sticky to handle. Either the hydration is over 60 percent (recheck your scale and water weight) or the dough has not been kneaded enough. Knead another 2 to 3 minutes until smooth.
2. Dough tears when stretching. Usually a same-day dough that has not relaxed enough. Cover, rest 10 minutes, try again. If it still tears, your gluten was underdeveloped during the knead.
3. No oven spring (flat, dense crust). Three possible causes: hydration too high, dough overproofed, or stone not at temperature. Recheck hydration first (most common). For overproofing, balls should look puffy and slightly domed, not collapsed.
4. Gummy bottom. Stone was not hot enough before launching. The IR thermometer should read 750F or higher on the front of the stone. If it reads 650F, wait 10 more minutes.
5. Crust charred, cheese not melted. Burner was on high during the bake. Drop to low about 90 seconds before launch. The Koda 16’s L-burner is aggressive; the front-right corner of the stone is the hottest, rotate accordingly.
6. Dough sticks to peel. Always semolina, never flour. Test-shake the peel before walking to the oven. If it sticks, lift the edge and add more semolina; do not try to launch a stuck pizza.
What to skip with an Ooni
The anti-recommendations:
- High-hydration home-oven recipes. A 70 percent recipe will produce a gummy mess in 60 seconds at 900F. Stay at 60 percent.
- All-purpose flour as a default. It works but is the weakest option. 00 flour or 12.7 percent bread flour are both meaningfully better.
- Rolling pins. Stretching is by hand only. A rolling pin deflates the gas bubbles you spent hours building.
- Cornmeal on the peel. Cornmeal scorches at 900F and tastes burnt. Semolina is the right answer.
- Water hotter than 110F. Kills yeast. Use 95F to 105F warm water.
- Skipping the autolyse. The 15-minute rest after mixing develops gluten with zero effort. Do not skip it.
- Adding olive oil to Neapolitan-style dough. Some recipes (including A Couple Cooks) include olive oil. Neapolitan tradition does not. Oil softens the crust and changes the texture. For an Ooni baking at Neapolitan temperatures, leave it out. If you want a New York-style crust instead, see our New York style pizza crust recipe, which intentionally uses oil.
- Trader Joe’s pizza dough. It is formulated for 65 to 70 percent hydration. Works in a pinch, but the result is not Neapolitan.
- Pre-shredded mozzarella. The anti-caking starch coating prevents proper melt and the cheese tastes plastic. Buy a fresh ball of mozzarella di bufala or fior di latte and tear it by hand.
FAQ
What hydration is the right Ooni pizza dough recipe?
60 percent. Higher heat in the Ooni means a 60 to 90 second bake, which means less time for moisture to evaporate before the crust sets. The 65 to 70 percent hydration used in home-oven recipes will produce a gummy crust at 900F.
What is the best flour for pizza dough in an Ooni?
Tipo 00 from an Italian mill. Caputo Pizzeria (red bag) is the standard. King Arthur Bread Flour at 12.7 percent protein is the best substitute if you cannot find 00. All-purpose works but is the weakest option.
Is the official Ooni pizza dough recipe good?
It is fine, but the 3 to 4 hour same-day schedule Ooni publishes is the worst of the four schedules in this article. The same ingredients cold-fermented for 24 to 48 hours produce a meaningfully better crust for the same hands-on time spread differently. Use Ooni’s official recipe when you need pizza tonight. Use the 24 to 48 hour cold ferment when you can plan ahead.
Can you make Ooni pizza dough overnight?
Yes. Mix and knead in the evening, bulk-ferment 30 minutes, ball, then cold-ferment in the fridge for 12 to 16 hours. Pull from the fridge 2 to 4 hours before pizza time to warm and finish proofing. Better than same-day, slightly less developed than the full 24 to 48 hour cold ferment.
How long can you cold-ferment Ooni pizza dough?
The window is 24 to 48 hours; the sweet spot is 36. Past 72 hours, the dough starts to overproof and the gluten breaks down. You get a slack, tearing dough with sour flavors from extended fermentation. Use the dough between hour 24 and hour 48.
Why does my Ooni pizza dough come out gummy?
Almost always one of two things: hydration too high (recheck your scale, you may have measured 70 percent thinking it was 60), or stone not at temperature before launch (IR thermometer should read 750F or higher on the front of the stone, not just under the burner).
The result
Pick a schedule based on your timeline. Same-day for tonight, overnight for tomorrow, 24 to 48 hour cold ferment for the weekend, poolish for the most-ambitious bake. Use 60 percent hydration regardless of schedule, 00 flour or bread flour, semolina on the peel, IR thermometer to verify stone temperature. The dough is the variable that breaks most people who buy an Ooni, not the oven. Get the dough right and the Ooni does the rest.
For the right oven to bake this dough in, see our Ooni Koda 16 review. For the foundational dough article that this recipe builds on, see our Neapolitan pizza dough recipe. For other regional styles that adapt to an Ooni at lower temperatures, the Detroit style pizza recipe bakes in a pan at 500F (use your home oven, not the Ooni), and the New York style pizza crust is the higher-hydration cousin of this recipe, designed for slightly cooler bakes.