A grill is the closest most people get to a real pizza oven without buying one, because a covered grill traps heat and runs hotter than any home oven. But “pizza on the grill” actually means two completely different techniques, and most guides only teach one. You can grill the dough directly on the grates for a thin, smoky, charred crust, or you can set a stone on the grill and bake on it like an oven. This covers both, when to use each, and how to not end up with dough melted through the grates.
TL;DR
- There are two methods. Direct on the grates (smoky, charred, thin) or on a stone set on the grill (oven-style, easier). Pick based on the crust you want.
- Always build a two-zone fire: hot on one side, cool or off on the other. Char over the hot side, melt over the cool side. A single screaming-hot zone burns the bottom before the top cooks.
- Direct method: oil the stretched dough, lay it on the hot grates, grill 2 to 4 minutes, flip, top the grilled side fast, then close the lid over indirect heat to melt.
- Use a firm dough, go personal-size, and prep everything first. A wet or huge pizza is the main way this goes wrong, and the flip-to-melt window is about two minutes.
- Gas is easier to control; charcoal and wood give more char and flavor.
- Frozen pizza: indirect heat with the lid closed, like an oven, not on bare grates.
The two ways to grill a pizza (and which to use)
Before you light anything, decide which method you are doing, because they want different dough and produce different pizza.
Method 1: directly on the grates. This is the original grilled pizza. The stretched dough goes straight onto the hot bars, the bottom chars and stripes, you flip it, top the cooked side, and close the lid to melt. The result is thin, crisp, blistered, and smoky, with grill marks and a flavor no oven makes. It takes a little nerve (you are putting bare dough on a fire), and it rewards a firm dough and a small pizza.
Method 2: on a stone or steel on the grill. Here you preheat a pizza stone on the grates with the lid down, then bake the pizza on the stone exactly as you would in an oven. No grate marks, no flipping, and it forgives wetter dough and heavier toppings. It is the easier, more conventional route, and it is the better choice if you want a normal-looking pizza or you are nervous about the flip.
Use the direct method for smoky char and thin, rustic pies. Use the stone method for an easier, oven-style pizza. The rest of this guide covers the direct method in detail (it is the one people get wrong), then the stone method, because both start with the same fire.
Set up a two-zone fire (gas or charcoal)
This single step prevents most grilled-pizza disasters. You want one hot zone to char and set the crust, and one cooler zone to finish melting without burning the bottom.
- On a gas grill: turn the burners on one side to high and leave the other side off or on low. That is your two zones.
- On a charcoal grill: bank the lit coals on one half of the grill and leave the other half bare.
Preheat with the lid closed until the hot side is genuinely hot, in the 500 to 600F range if your grill has a thermometer. A closed, preheated grill behaves like an oven that also chars, which is exactly what you want. For how heat maps to crust, see our pizza oven temperature guide.
Method 1: pizza directly on the grates (step by step)
The right dough for direct grilling
Direct grilling wants a firm, workable dough, not a wet, slack one. A dough around 60% hydration handles the grates far better than a sticky 70%-plus dough, which sags between the bars and sticks. A New York-style dough is ideal; a very wet Neapolitan dough is better suited to the stone method below. Divide the dough into personal-size portions (8 to 10 inches). A small pizza is dramatically easier to flip than a large one, and grilled pizza is a per-person food anyway.
Grill, flip, top, and melt
The whole sequence is fast, so the rule is mise en place: have the sauce, cheese, pre-cooked toppings, olive oil, tongs, and a peel or board all sitting grill-side before the dough touches the grates. Once you flip, you have about two minutes, and you cannot run inside for the cheese.
- Stretch the dough thin, about 1/4 inch, using our stretching method. Brush the top surface with olive oil and carry it to the grill on a floured peel or an oiled, rimless sheet.
- Lay it oiled-side-down on the hot side of the grates. Grill 2 to 4 minutes, lid up, until the bottom has clear grill marks, the top is bubbling, and the dough is set enough to move. While it grills, brush the now-upward top with a little more oil.
- Flip it with tongs or a peel. The grilled, striped side is now facing up and becomes your top surface.
- Top it fast and light. Spread a thin layer of sauce, a moderate amount of low-moisture cheese, and only pre-cooked or quick-cooking toppings. Raw sausage or thick vegetables will not cook in the time you have.
- Move it to the cool side and close the lid for 2 to 5 minutes to melt the cheese and finish the bottom. Watch it closely; grills run hot and the line between charred and burnt is thin. Pull it when the cheese has melted and the bottom is crisp.
The first one may be ugly. That is normal. By the third you will have the rhythm, and a grilled pizza with a properly charred, smoky bottom is a genuinely different and better thing than most home ovens produce.
Toppings for the grill
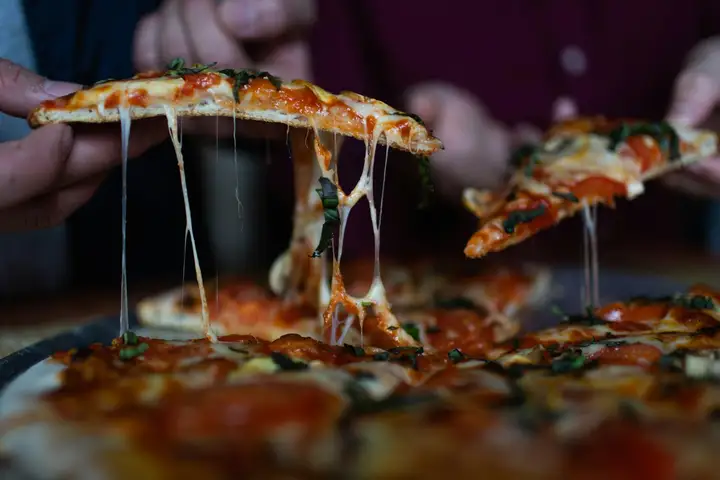
Toppings are where grilled pizza is won or lost, because of that two-minute window. Serious Eats’ Kenji Lopez-Alt, in his complete guide to grilled pizza, makes the case for keeping them dry and pre-cooked, and it holds up: fresh mozzarella and raw, watery vegetables release moisture that the brief melt cannot drive off, so they leave you with a soggy top. Low-moisture cheese, drained or marinated vegetables, and already-cooked meats give the best result. Think pesto, caramelized onions, cooked sausage, roasted peppers, and a handful of arugula or basil added after the pizza comes off the grill, rather than raw mushrooms under a flood of sauce. The short cooking time is a constraint, so treat every topping as something that needs to be ready to eat the moment the cheese melts.
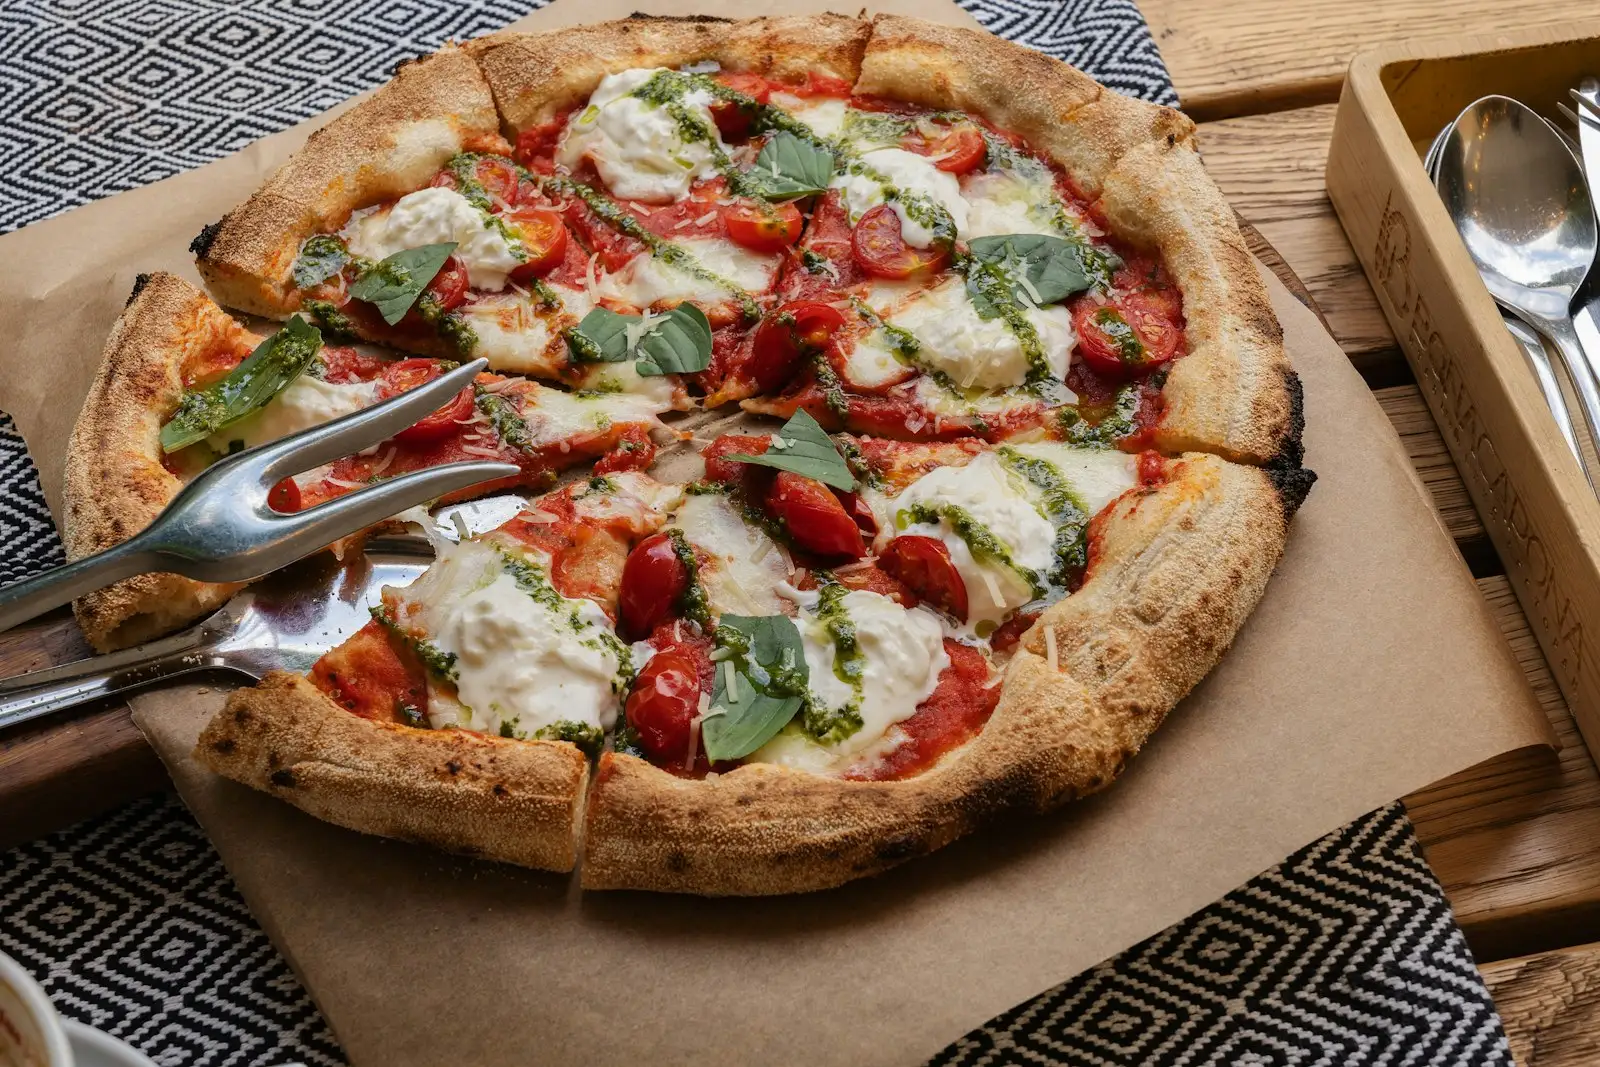
Method 2: pizza on a stone or steel on the grill
If you would rather not flip bare dough over a fire, turn the grill into an oven. Set a pizza stone or steel on the grates over the cooler, indirect side (direct flame under a stone can crack it), close the lid, and preheat 20 to 30 minutes. Then build the pizza on a floured peel, slide it onto the hot stone, close the lid, and bake 6 to 10 minutes like a normal pizza. You get a crisp bottom from the stone and a faster, hotter bake than your kitchen oven, without grate marks or a flip. This is also the method to use for a wetter dough or a more heavily topped pie. It is the natural middle step between a home oven and a dedicated outdoor pizza oven.
Gas grill vs charcoal
Both work; they trade control for flavor.
Gas is the easier choice, especially for the direct method. You set the two zones with the burner knobs, the temperature holds steady, and there are no coals to manage. The tradeoff is less smoke flavor and less raw heat. For most people learning to grill pizza, gas is the place to start.
Charcoal and wood burn hotter and give real smoke and char, which is the whole appeal of grilled pizza. The tradeoff is control: coals are harder to hold at a steady temperature, flare-ups are more likely, and you have to manage the fire. If you want the most flavor and you are comfortable with a charcoal grill, it makes a better grilled pizza. As Modernist Cuisine notes in their outdoor-grill pizza guide, both charcoal and gas can produce excellent results; the fire management just differs.
Frozen or premade pizza on the grill
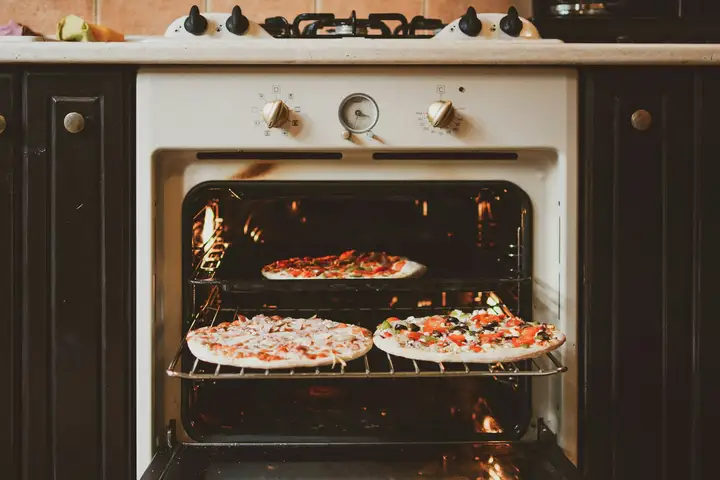
You can absolutely grill a frozen pizza, but not on bare grates, where it will sag through, stick, and scorch before the middle thaws. Treat the grill as an oven instead. Set up indirect heat, keep the lid closed, and cook at roughly 400 to 450F for 10 to 15 minutes, ideally on a preheated stone, a sheet pan, or the upper warming rack. A par-baked or premade crust (the shelf-stable kind) is already cooked, so it can take a short stint over direct heat to crisp and char the bottom, then move to indirect to melt the top.
Common mistakes (what to skip)
- One screaming-hot zone, no cool side. Direct high heat under the whole pizza burns the bottom before the top melts. Build two zones, every time.
- A wet or too-thin dough. Slack, high-hydration dough sticks to the grates and sags between the bars. Use a firmer dough around 60% hydration, and do not roll it paper-thin.
- A pizza too big to flip. Go personal-size. A 16-inch pizza on a grill is a forearm burn waiting to happen.
- Not prepping toppings first. The flip-to-melt window is about two minutes. Everything must be grill-side and ready before the dough hits the grates.
- Raw, wet, or heavy toppings. They will not cook in time and they steam the crust soft. Pre-cook sausage and dense vegetables, drain wet ones, and go light.
- Forgetting to oil the dough. Oil is what keeps the dough from welding to the grates. Brush both sides.
- Opening the lid constantly. Every peek dumps heat. Close the lid to melt and resist the urge to check every 20 seconds.
- Direct flame under a stone. If you use the stone method, keep the stone over indirect heat; a stone over a roaring burner can crack from the uneven heat.
FAQ
Can you grill pizza directly on the grill?
Yes, and it is the original grilled pizza. You lay stretched, oiled dough straight onto the hot grates, grill it 2 to 4 minutes until the bottom has grill marks and the top bubbles, then flip it, quickly top the grilled side, and close the lid over indirect heat to melt the cheese. The dough does not fall through if it is a firm, not-too-thin dough and the grates are hot. This method gives a thin, smoky, charred crust you cannot get in an oven.
What is the best way to cook a pizza on a gas grill?
Set up a two-zone fire: light the burners on one side to high and leave the other side off or low. Then either grill the dough directly over the hot side and finish over the cool side with the lid down, or preheat a pizza stone on the grates with the lid closed for 20 to 30 minutes and bake the pizza on the stone like an oven. Gas makes the two-zone setup easy because you just adjust the knobs. Keep the lid closed as much as possible to hold heat.
Do you need a pizza stone to grill pizza?
No. The direct method puts the dough right on the grates and needs no stone at all. A pizza stone or steel is the alternative method: it turns the grill into an oven, gives a more conventional (non-grate-marked) crust, and handles wetter dough and heavier toppings more forgivingly. Use the direct method for smoky char, the stone method for an easier, oven-style pizza.
Can you cook a frozen pizza on the grill?
Yes, but do not put it directly on the grates; a frozen pizza will sag, stick, and char before it thaws. Treat the grill as an oven instead: set up indirect heat (burners on one side, pizza on the other), keep the lid closed, and cook at around 400 to 450F for 10 to 15 minutes, ideally on a preheated stone, a pan, or the upper rack. A par-baked or premade crust can go briefly over direct heat since it is already cooked.
What are the common mistakes when grilling pizza?
The big ones: a fire that is too hot directly under the pizza (it chars the bottom before the top cooks, so use two zones), a dough that is too wet or too thin (it sticks and sags through the grates), too large a pizza to flip (go personal-size), not prepping the toppings in advance (the flip-to-melt window is about two minutes), and piling on raw or wet toppings that never cook in that short window. Oil the dough, keep it light, and have everything ready grill-side.
What this earns you
A grill, used right, gives you charred, smoky, blistered pizza in your backyard with gear you already own. The whole thing comes down to a few choices: pick your method (direct for char, stone for ease), build two heat zones, keep the dough firm and the pizza small, and have everything ready before the dough hits the fire.
Get comfortable with the direct method and you have a genuinely great pizza that no home oven can match. Prefer the stone route and you have an easy outdoor pizza on the equipment in your yard. Either way, once you are grilling pizza well, the only real upgrade left is a dedicated outdoor pizza oven, and even then, the grill stays in the rotation all summer. If a grill is not an option tonight, a preheated cast-iron skillet is the best indoor stand-in for that same crisp, charred bottom.